How to read Pristine Lunacy (Lunatic)
Author: Helio Knight
Pristine Lunacy is Junko's 5th spell-card in the game Legacy of Lunatic Kingdom. Pristine Lunacy is a pattern that seems ridiculous at first but gets much easier once you understand how to read the pattern better. I will break the pattern down first and then explain how I read incoming waves as well as some alternate methods for reading it.
Thanks to my friend Innocence for teaching me how to read this pattern.
So let’s start by explaining the pattern a bit.
The spell always starts with a Purple wave and alternates between Purple and Red. Every odd wave will be Purple and every even wave will be Red. It’s important to remember this because Purple waves will curve in an S-like formation at the bottom where you are at while Red waves will be a mirrored S. This is important because this tells you which side the laser will be at. Now that we understand the formation of the wave I will also explain how each wave works.
Think of each wave as having 3 parts to it:
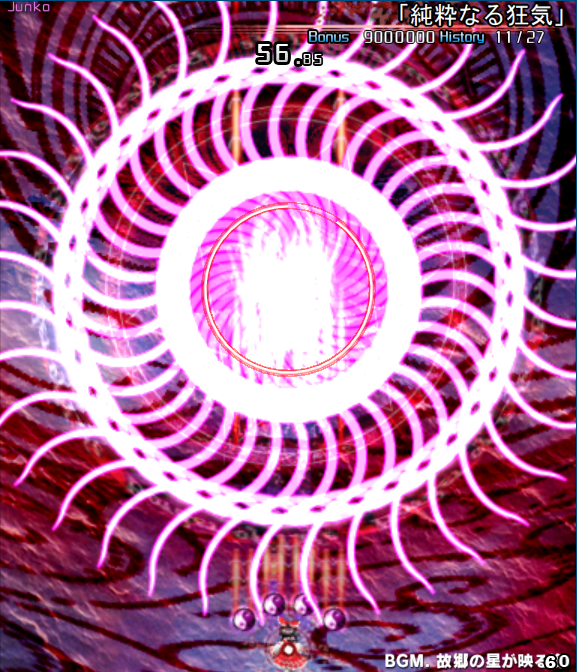
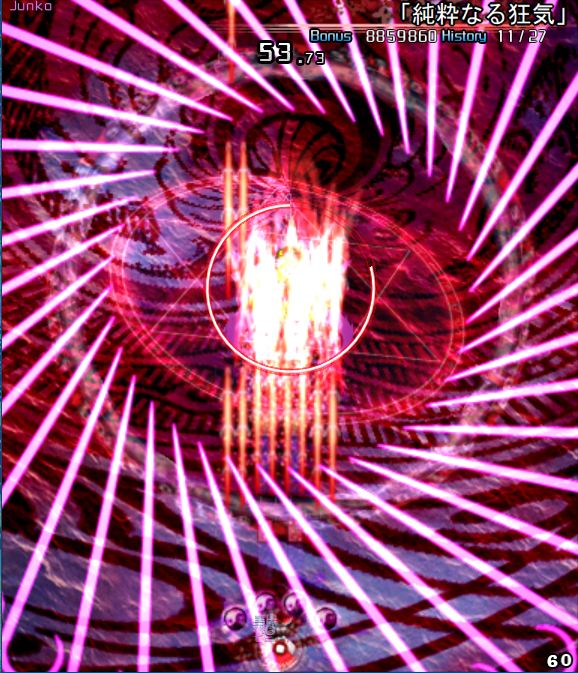
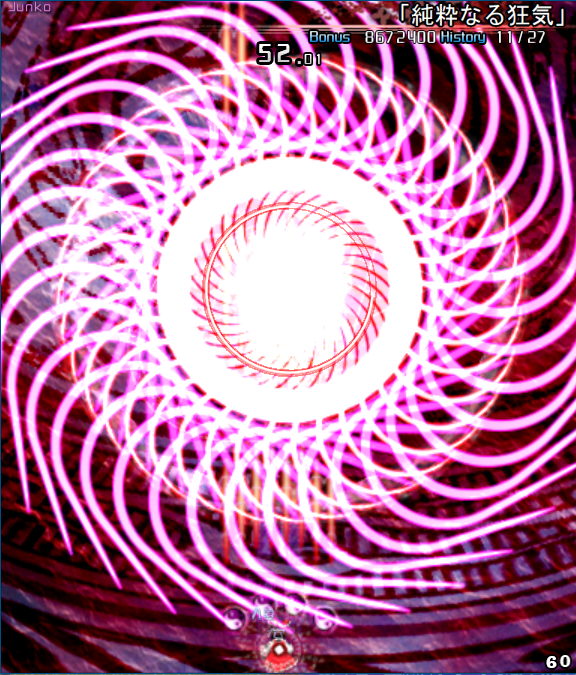
Every wave will operate this way alternating between Red and Purple lasers.
It is easy to understand the laser formation but it is more difficult to read the laser formation. In the next parts I will break down the easier part of this spell, which I will call the loop around and the followthrough.
For the loop around it is extremely easy. As mentioned before, when the lasers pan out there will be an S or mirrored S depending on which wave it is. By simply putting yourself into the curved area of the laser you will be completely safe from the laser coming from below.
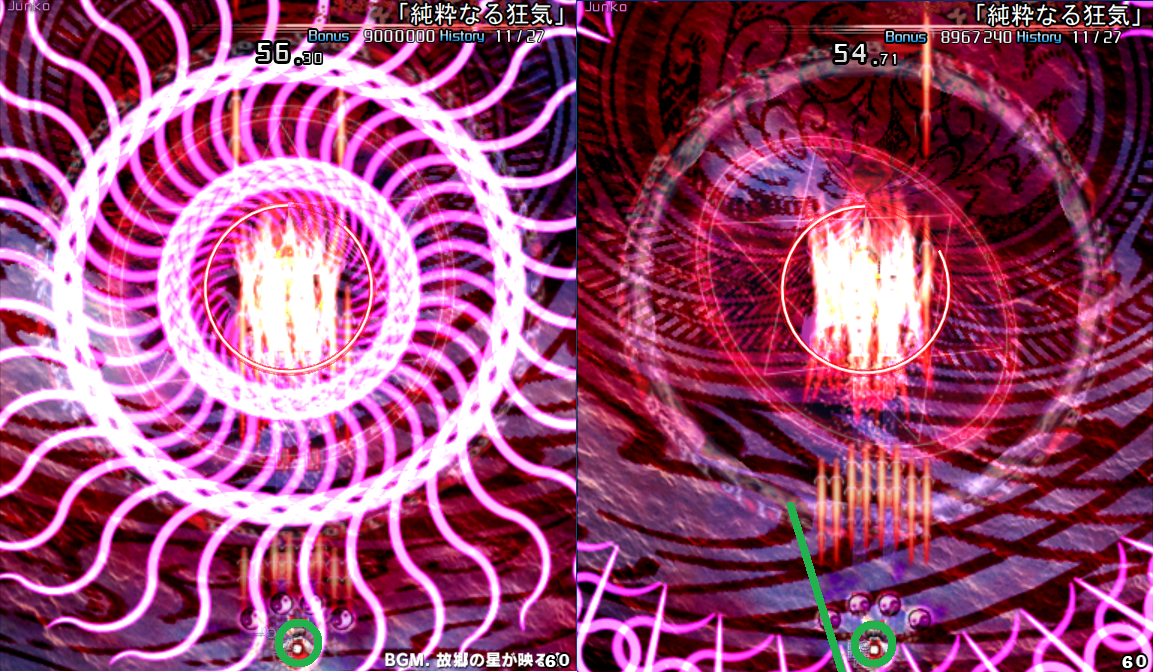
The followthrough is one thing that trips people up a lot when they first experience this pattern. On Lunatic it is actually quite simple. By simply positioning yourself close to the laser in the convex side (for purple waves it’ll be the laser to your left. For red the laser on your right) you won’t even have to move to avoid the lasers coming back.
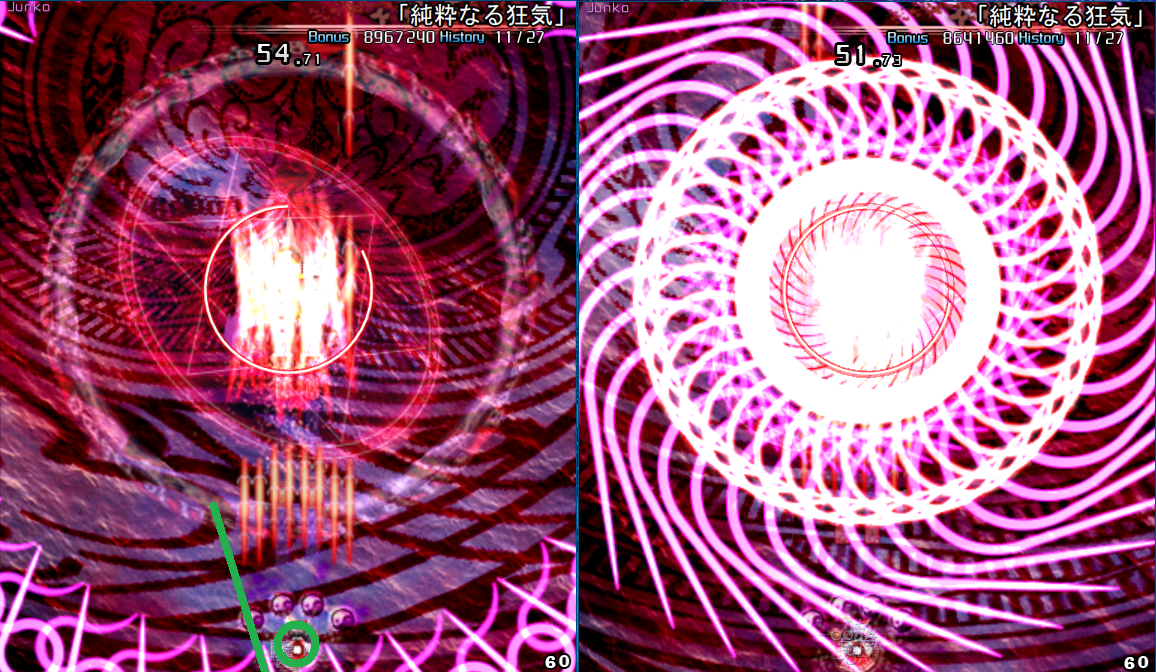
Now comes the hard part and that is the overlap of the followthrough and the next wave’s initial blast. This part is the part that causes most people to immediately call this spell bad resign or a RNG-dependent attack, but Pristine Lunacy is just a difficult reading spell.
For starters I’m going to explain how I read this spell and afterwards I’ll explain some other methods people use. Personally, I feel the way I do it is the easiest as it’s very easy to see the visual cue and it also gives you the most amount of time to react compared to other reading methods.
The next wave starts around the time the previous wave’s followthrough is about to reach you. This makes it so that each (except the first) initial blast has to be dealt with while enclosed by lasers. You have very limited space so it’s important to make use of this space.
If it weren’t for the fact that the followthrough can be avoided simply by standing still then this would be much harder but thankfully you can sit safely and look where you need to look.
For the method I use, I keep my eyes locked to right in front of Junko.
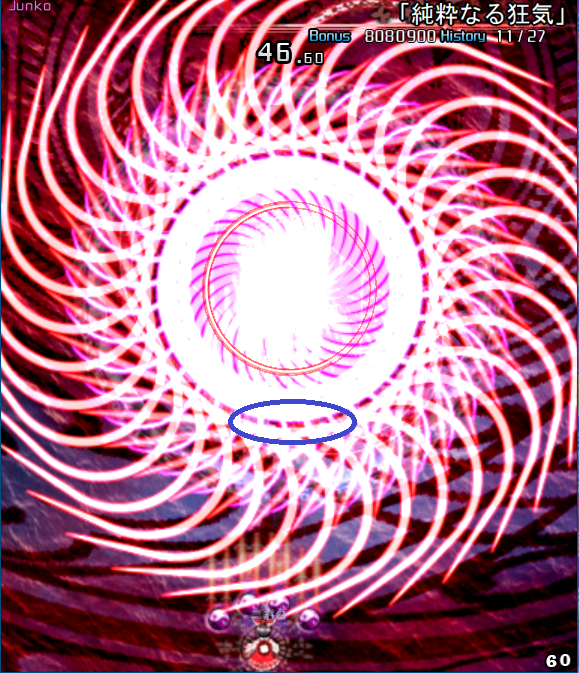
I look at the gaps that form between the lasers and use those to judge where the safe areas are going to be.
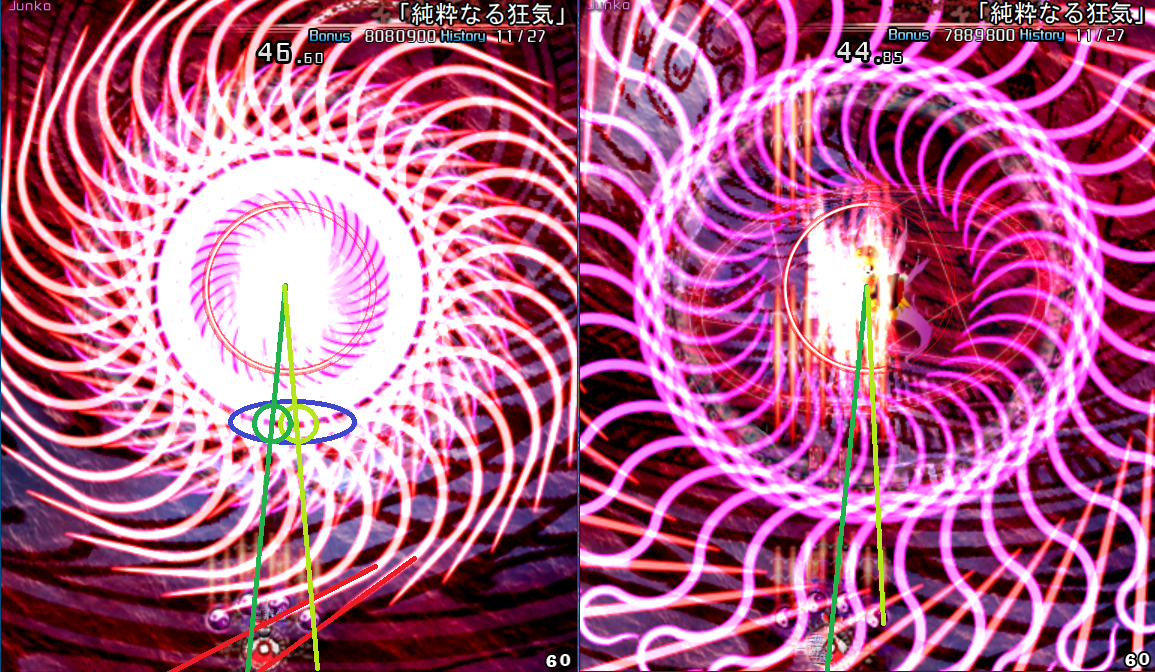
You may have also noticed that I didn’t just draw a straight line down from the gap but rather an angled line that starts at Junko. This is undoubtedly the hardest part to understand. The pattern is basically a perfect circle around Junko.
It doesn’t stop there, as I mentioned at the start, the lasers have a random initial rotation meaning that they aren’t always going to be in the same spots. Sometimes the rotation will put a laser directly on route to hit you while you’re sitting at the bottom. Other Times you won’t even have to move.
So what do we do if the only gap that can work is further to the side, such as below? Quite simple actually:
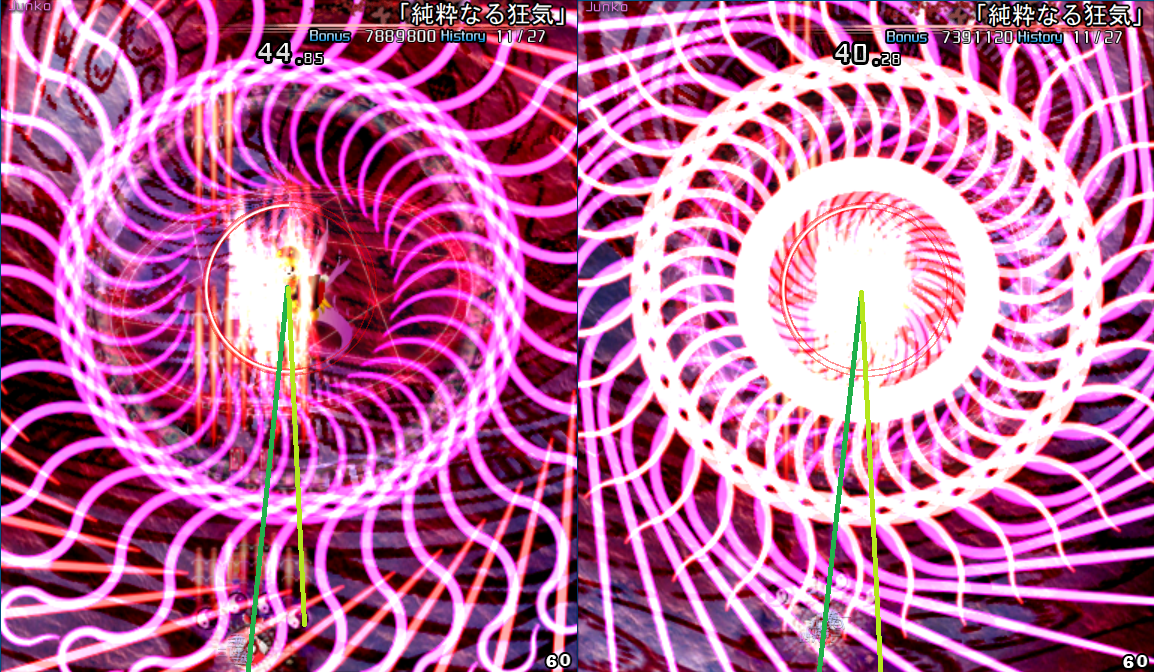
In situations like this you’ll also want to keep in mind the loop around as there might be a chance that you get put into an awkward spot to avoid it. It’s rare thankfully.
Something VERY IMPORTANT to keep in mind is where you’re at in relation to Junko. What I mean by that is how far to the sides you end up getting pushed. As mentioned earlier, this spell is basically a perfect circle around her so if you are getting pushed too far then not only does it make reading a lot harder but also remember what this spell looks like at the corners? Yeah, you don’t want to deal with that. Fortunately repositioning to get back centered isn’t too difficult but you don’t want to worry about it unless you’re getting pushed to one side a bit too much. Basically, in the short time between the initial blast and the loop around you’ll want to move up and put yourself back down. Be quick about this because otherwise you may miss your opportunity to read the next wave which will force you to react to it instead and you don’t want that to happen.
I don’t have much (or any) experience with these reading methods so I’m not going to break them down nearly as much. I’m only going to be explaining reading the overlapping part since the loop around and followthrough remain the same.
One method is looking at where the laser is going. This method I don’t like as I’m not very good at seeing the correct laser and also it is hard to see this in the first place when it’s hidden behind a followthrough.
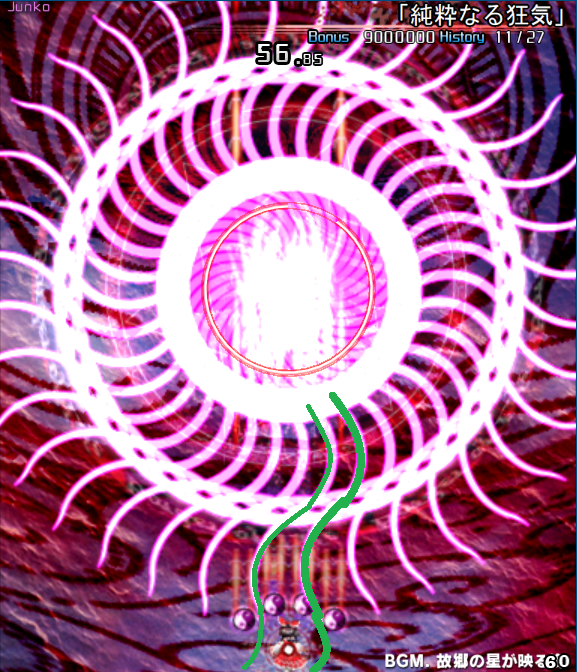
Another method is the look at where the lasers are looping around closest to you.
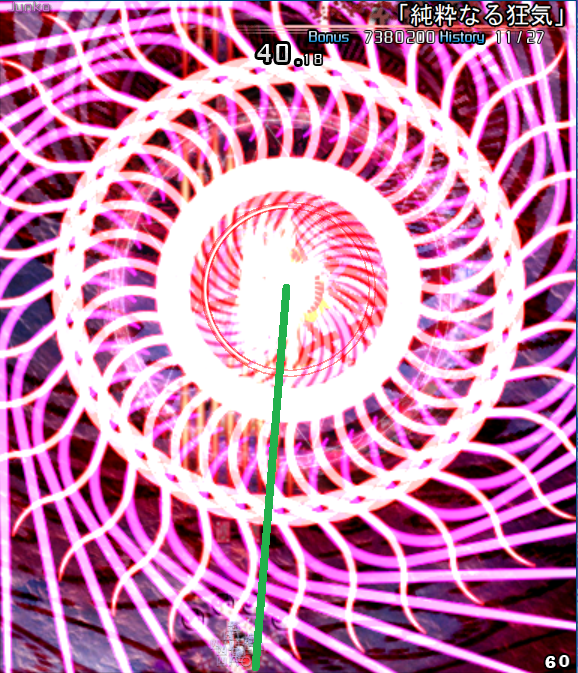
Again, I personally find it difficult to see that most of the time and this also gives you the least amount of time to read it so I don’t recommend it.
You can also try reading these gaps the lasers form.
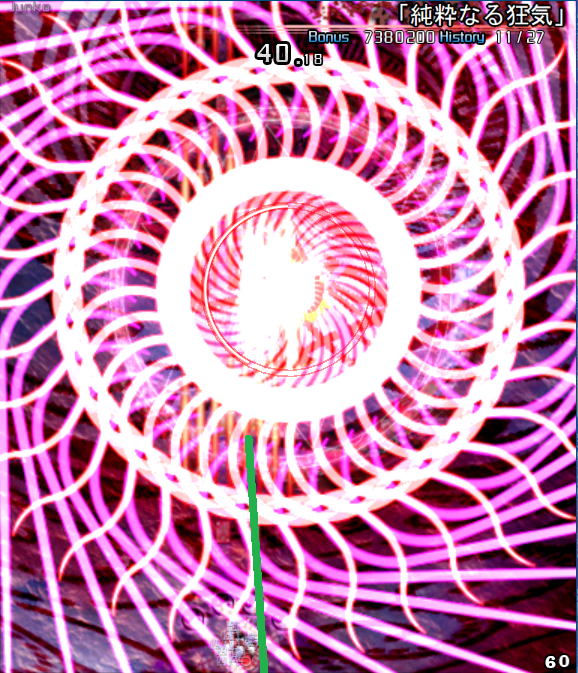
I personally find this method awkward but that’s just me.
There’s also a really stupid, RNG heavy method that I’m not going to show because for one. I don’t know it. And two. You shouldn’t attempt it in the first place.
Once you learn a consistent reading method that works for you then you should have no problems capping this spell consistently at some point. Though if you are playing as Sanae then have fun trying to see anything. Thank you snakes.
Thank you for checking out the guide written by Helio Knight !
Here is the link to the original guide: https://docs.google.com/document/d/1yQWvgiiUE715P_K75wu_mwECzOGMjcwj/edit